Tips for DIY Tile Roof Repair
Posted by admin in Roofing on Apr 5th, 2018 | Comments Off on Tips for DIY Tile Roof Repair
Tile roof repairs can be a very challenging activity to carry out. By avoiding some common mistakes, you’ll achieve success in repairing your tile roof.
Replacement Tiles
As challenging as tile roof repair can be, you can still find it easy to take a faster route and worry less about the tile you are replacing another with. You should know it has to be the same type of tile and the same color as well. If you ignore these conditions, then you’ll be left with nothing but a clumsy-looking tile among many other tiles. Not only will the roof look bad, it may as well not click properly into the right place with other tiles.
Make Sure You Get a New Tile
Some people will tell you to take a tile from the less visible area of your roof to replace the damaged one. DON’T DO THIS! Let me reiterate- under no circumstance should you this. Doing this will only leave that “less visible” part of the roof exposed, which is why we recommend you keep about ten tiles in the garage is a good idea. So, when you have a damaged tile, all you have to do is remove the damaged one and slot in the new one. Voila!
Be Careful
Removing a tile out of its position may be challenging. This is where using a crowbar comes in. However; it is important to do this carefully because if you don’t, you may end up damaging another tile or even cause tiles to fly across other parts of the roof.
Do Not Assume
For you to have a broken tile(s), there is definitely a reason for this. It may be caused by the weather or an error when the roof was being fixed from the onset. Do not assume the broken or damaged tile is a one-off. Make sure you check other tiles around the damaged tile as this could make you aware of any problem you have to deal with.
Watch Your Step!
Replacing the tile yourself will most likely make you become single-minded. Meaning- you will only be focused on changing the broken tile forgetting other important roof-related factors. Some tiles may be a little difficult to reach; you should try as much as possible not to directly put your weight on a tile because it will put too much pressure on the tile which may cause it to break.
Coating and Sealing a Flat Roof
Posted by admin in Roofing on Feb 10th, 2018 | Comments Off on Coating and Sealing a Flat Roof
Get the job done right the first time
Carefully consider the difficulty of DIY flat roof repair. If you have any doubt, we recommend you contact a professional roofer or painter in your area. This is one of those tasks that you really want to be sure to get the job done right the first time. Often trying to attempt a complicated job can result in what looks like victory, but can result in more problems down the road and may even end up costing a lot more money.
For flat roofing, get the job done right by consulting a professional with expertise and experience. We recommend APR roofing in Scottsdale, Arizona.
Regular Maintenance
Flat roofs require regular maintenance by cleaning the debris that may build up and clog roof drainage. In Arizona, the blazing heat can cause the sealing compound to break down over time. We recommend you get it resealed and recoated every time you paint the exterior, which should be about every 5-7 years.
How we do it
- First, sweep all the dirt and debris off the surface. It is important to ensure you have a clean surface for roofing cement to stick to properly.
- Next, cut around any areas that are cracked or peeling and remove the bad sections. Be sure to make your shapes either squares or rectangles. It makes it easier to keep them uniform and easier to replace with new materials.
- Try to take that cut-out piece and use it to measure a new piece of shingle or roofing material. You will want to ensure that cement or putty around the edges is adequate to keep a watertight seal. Flat tops on buildings can allow standing water if there is not proper drainage (yes, even in Arizona if only for a couple of days). So, you don’t ant to allow the water to have a place where it can seep in and cause more damage in the long run. Patch a full layer of cement seal to ensure all edges are tightened down.
Follow these tips to properly seal your flat roof and it should last as long as the house. Oh, and shout out to our fellow contractors at BGB Painting for the tips.
Tips for stucco painting
Posted by admin in Roofing on Feb 3rd, 2018 | Comments Off on Tips for stucco painting
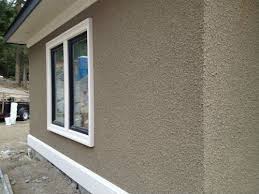
Prep your stucco for painting
As with anything you paint outside, you’ll want to clean your old stucco thoroughly and remove loose paint before applying paint to it. Essentially, you can wash off your stucco with a garden hose, but it’ll be a good idea to scrub your walls with a strong nylon brush. Work the brush into dirty areas to remove dirt, stains and mildew.
Your stucco may have cracks showing. While this usually isn’t a problem, you can easily fill these in with acrylic latex caulk. Check that it is for outdoor use and is paintable. For cracks wider than the thickness of a credit card, you can use vinyl concrete patch or elastomeric (synthetic rubber) stucco patch. Apply with a small putty knife. If cracks are wide (more than a quarter of an inch or so), you should get your stucco looked at before painting as it may be weak and ready to come off your wall. Simply squeeze the caulk all along and into cracks, then wipe it into the cracks firmly with your finger or a rag, removing excess after you’re done.
Paint that stucco wall
When you’re ready to paint, be certain to use a good latex paint. You can find this paint with a label that will tell you it’s just for stucco. Always apply two coats. Two will last longer and look much better. A thick nap paint roller with a powered roller pump are usually the best ways to paint stucco walls and ceilings. Roll the paint over the stucco in multiple directions to get every nook and cranny.
DON’T LET ICE DAMS DAMAGE YOUR ROOF
Posted by admin in Roofing on Jan 9th, 2018 | Comments Off on DON’T LET ICE DAMS DAMAGE YOUR ROOF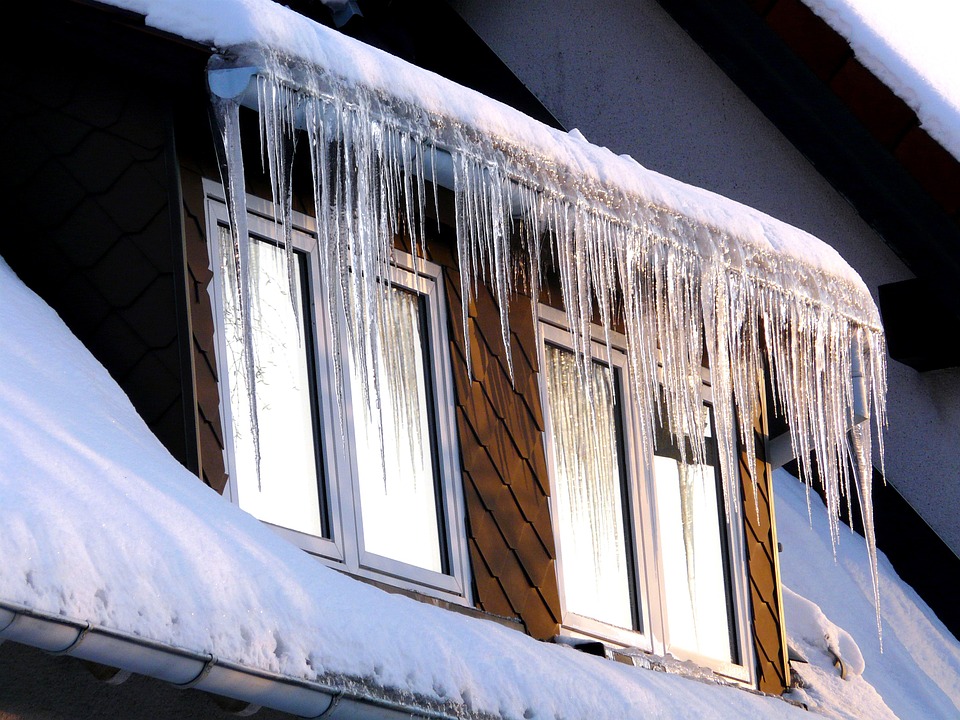
What are ice dams?
Ice dams are dam-like buildups of ice normally found at the edge of the roofing system. The melt water from the snow forms a pool behind the dam. Most roofs are designed to shed water effectively but not to manage pools of water. The water behind the ice seeps under the shingles and gets it way through the roof to the living areas below. Although the ice dams are temporary in nature, they can cause more damage to your floor, paint, wall, wiring and furnishings.
What causes an ice dam?
In most cases, ice dams form when heavy snow falls and then succeeded by freezing temperatures. Some areas of your roof warm up enough to melt the snow but the melt water refreezes when it flows to other cooler zones of the roof. This results in a small dam and finally melt water accumulates behind the dam. The water will seep into the shingles and begin to leak into the living room.
Ice damming is mainly caused by uneven roof temperatures, weather, roof underlayment that water can penetrate and household heat escaping to the attic.
How to prevent ice dams
- Attic ventilation
Attic ventilation is the easiest way to prevent ice damming though it is mostly ignored. An attic could be insulated but it can be affected by the uneven sunlight. You need the intake and exhaust vents in your attic ventilation system and avoid covering them on the outside. Warm air rises and gets out through the exhaust vent allowing cool and fresh air to get in through the intake vent. This prevents the warming up of any part of the roof by the rising warm air.
- Attic insulation
Most warm spots on the roof occur because of the escaping heat from the heated parts of the house. Homes have attic insulation but in most cases, there isn’t sufficient amount or it is less effective.
If heating ducts that run through the attic to other parts of the home are insufficiently insulated, an ice dam can result from the leaking heat. You should also seal up some access doors to prevent leaks.
- Proper re-roofing
You need to install a waterproof shingle underlayment. This is a special self-sealing sheet placed on the roof before shingles get installed. This kind of membrane remains waterproof even when nails get hammered through it. This guarantees you safety when ice dams occur since it won’t allow water to get into your home.
