Coating and Sealing a Flat Roof
Posted by admin in Roofing on Feb 10th, 2018 | Comments Off on Coating and Sealing a Flat Roof
Get the job done right the first time
Carefully consider the difficulty of DIY flat roof repair. If you have any doubt, we recommend you contact a professional roofer or painter in your area. This is one of those tasks that you really want to be sure to get the job done right the first time. Often trying to attempt a complicated job can result in what looks like victory, but can result in more problems down the road and may even end up costing a lot more money.
For flat roofing, get the job done right by consulting a professional with expertise and experience. We recommend APR roofing in Scottsdale, Arizona.
Regular Maintenance
Flat roofs require regular maintenance by cleaning the debris that may build up and clog roof drainage. In Arizona, the blazing heat can cause the sealing compound to break down over time. We recommend you get it resealed and recoated every time you paint the exterior, which should be about every 5-7 years.
How we do it
- First, sweep all the dirt and debris off the surface. It is important to ensure you have a clean surface for roofing cement to stick to properly.
- Next, cut around any areas that are cracked or peeling and remove the bad sections. Be sure to make your shapes either squares or rectangles. It makes it easier to keep them uniform and easier to replace with new materials.
- Try to take that cut-out piece and use it to measure a new piece of shingle or roofing material. You will want to ensure that cement or putty around the edges is adequate to keep a watertight seal. Flat tops on buildings can allow standing water if there is not proper drainage (yes, even in Arizona if only for a couple of days). So, you don’t ant to allow the water to have a place where it can seep in and cause more damage in the long run. Patch a full layer of cement seal to ensure all edges are tightened down.
Follow these tips to properly seal your flat roof and it should last as long as the house. Oh, and shout out to our fellow contractors at BGB Painting for the tips.
Tips for stucco painting
Posted by admin in Roofing on Feb 3rd, 2018 | Comments Off on Tips for stucco painting
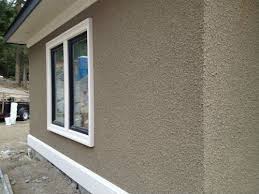
Prep your stucco for painting
As with anything you paint outside, you’ll want to clean your old stucco thoroughly and remove loose paint before applying paint to it. Essentially, you can wash off your stucco with a garden hose, but it’ll be a good idea to scrub your walls with a strong nylon brush. Work the brush into dirty areas to remove dirt, stains and mildew.
Your stucco may have cracks showing. While this usually isn’t a problem, you can easily fill these in with acrylic latex caulk. Check that it is for outdoor use and is paintable. For cracks wider than the thickness of a credit card, you can use vinyl concrete patch or elastomeric (synthetic rubber) stucco patch. Apply with a small putty knife. If cracks are wide (more than a quarter of an inch or so), you should get your stucco looked at before painting as it may be weak and ready to come off your wall. Simply squeeze the caulk all along and into cracks, then wipe it into the cracks firmly with your finger or a rag, removing excess after you’re done.
Paint that stucco wall
When you’re ready to paint, be certain to use a good latex paint. You can find this paint with a label that will tell you it’s just for stucco. Always apply two coats. Two will last longer and look much better. A thick nap paint roller with a powered roller pump are usually the best ways to paint stucco walls and ceilings. Roll the paint over the stucco in multiple directions to get every nook and cranny.
